Steampunk PC Case Mod: Part 1
Monday, 17th February 2025
My current PC case is a mess. It was my first watercooled build, and I overdid everything - the rad was too big, the res was too big and I really struggled to fit everything in. I was also upgrading and modifying my daily driver, so everytime I tweaked or added something, it always had to be in working order again by the end of the day. It was a bit of a rush job - and it showed.
A few upgrades later and it has suffered from smashed glass panels which have been replaced with rough cut plastic sheets, a coolant leak and CPU and GPU upgrades meant a switch back to air-cooling. So it's a bit of a franken-pc, relegated to sitting behind my screens.
Out of sight, out of mind!
So, I'm well overdue for a new system and this time I want to do a fully themed build. It doesn't need to be my daily driver yet, so there's no rush and I can take my time and even experiment, get things wrong or change my mind.
The concept
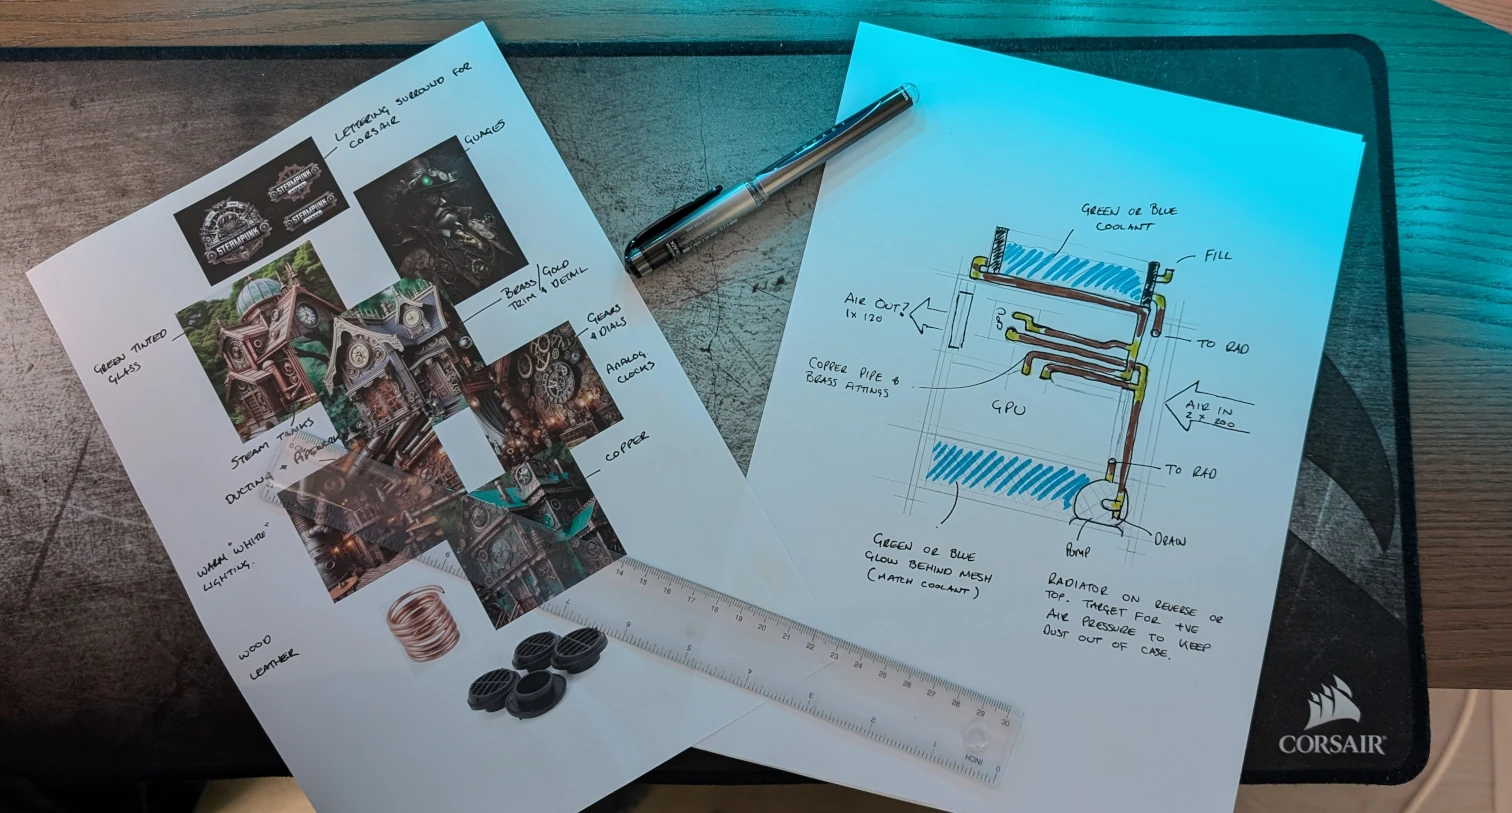
As the title and the header might have given away, I'm going for a Steampunk theme.
Away from the keyboard, I enjoy woodwork as a hobby and really like it when "soft", tactile materials like wood and leather meet metals like brass and steel. I'm also very hands on and love to tinker. So the theme of "old mechanical design meets technology" appeals to me.
From a technical point of view, these are some of the things I want to tick off the list on this build:-
1.) Fully water-cooled. Even though my current PC leaked and stained the wooden floor red with coolant, I was very happy with temperatures which hardly changed even on long gaming sessions and the very low noise levels from the water pump. At least the CPU and GPU, but I would also like to try watercooling motherboard components if possible.
2.) Bespoke wiring. I'm not talking about heading over to cablemod.com and buying a set that is a close colour-match for the build, but fully bespoke wiring. I have a soldering-iron and I know how to use it. Although, I am a little concerned with the reports of melting GPU power connectors - so I'm going to have to be careful.
3.) Monitoring. I want to monitor water temperature at key points in the loop, and the flow rate. I would like to incorporate some retro style analogue needle guages into the build. But I might settle on some round OLED screens which I can then at least make them look like needle guages.
4.) Lighting. Subtle warm white glow, pehaps with some green or blue accent colours on some components. I like the idea of the coolant being green.
And from my 8 year old son 🥰:-
"a water tank at the bottom and a dome-thing on the top. When you press a button it bubbles in the dome and flows into the tank at the bottom".
I'm not sure where he got this from, but I like his idea of bubbling water. Might have to be a separate tank though, as having air bubbles in the coolant loop is not going to work well! 😆
Foundations
To kick things off, I have chosen the Corsair Frame 4000D mid tower case.
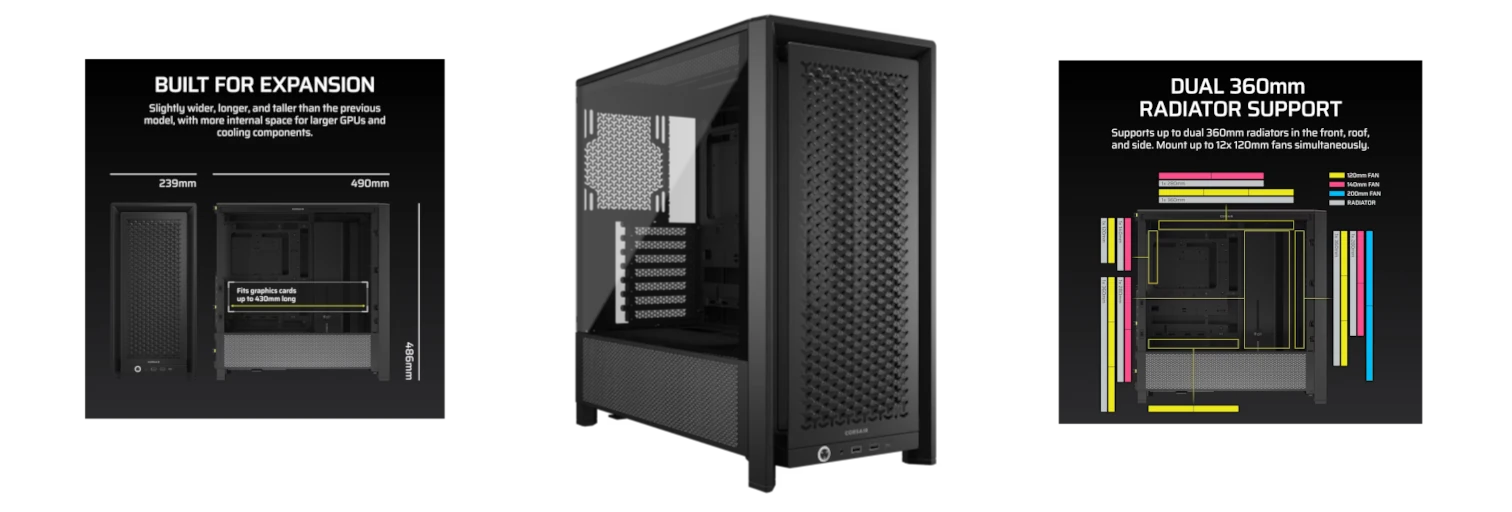
This is avery flexible case with lots of options for the placement of fans and radiators which should help experimenting with different options. It supports vertical GPU installation (which is also on my whishlist) and plenty of spares are available from Corsair - should I mess anything up on the build.
It also strips down very well which will help with painting and manufacturig or modifying any components. When I say it strips down very well...
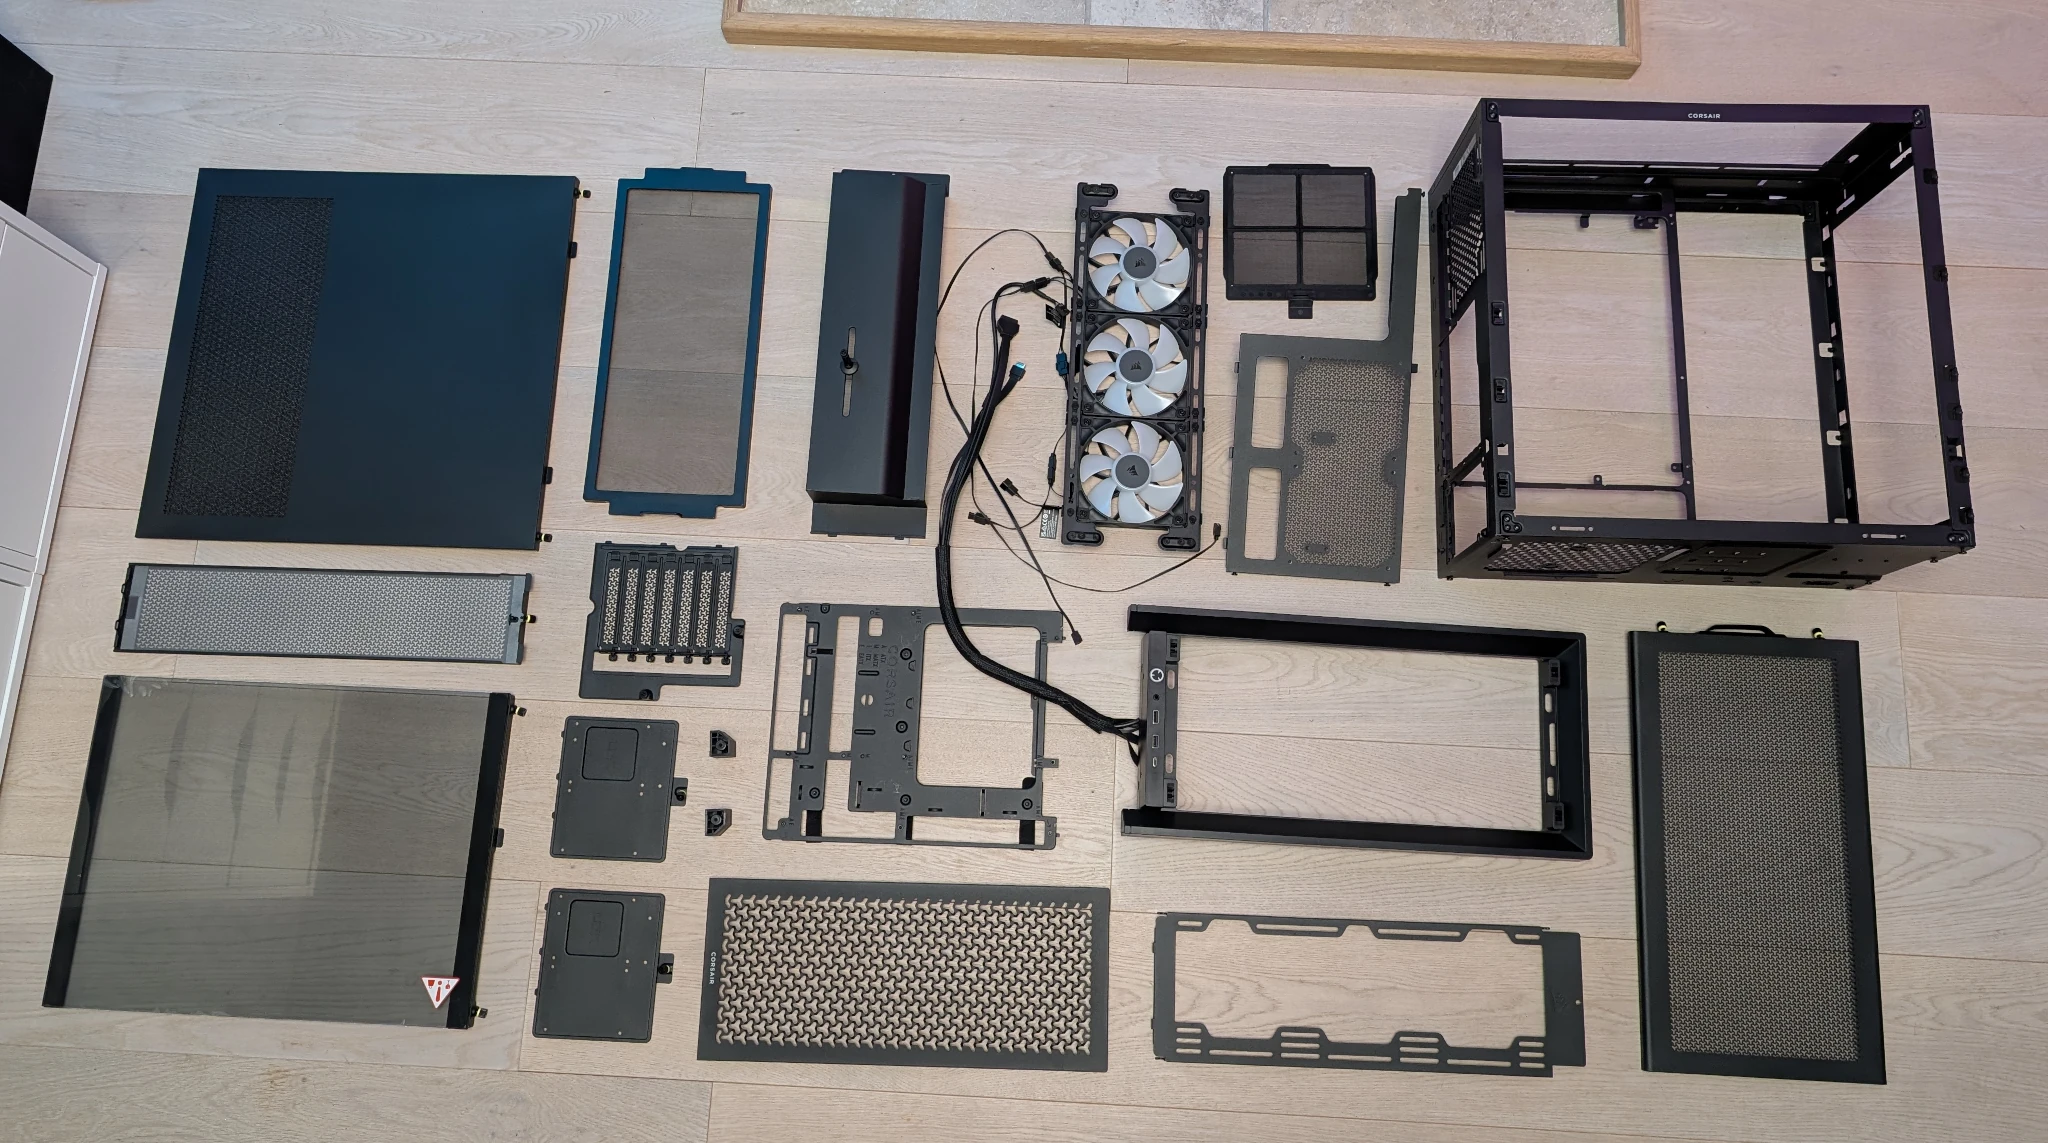
... I just hope I can remember where it all went! 😆